> ## Documentation Index
> Fetch the complete documentation index at: https://langchain-5e9cc07a-preview-javaex-1765204202-a1f8093.mintlify.site/llms.txt
> Use this file to discover all available pages before exploring further.
# Self-host LangSmith on Kubernetes
Self-hosting LangSmith is an add-on to the Enterprise Plan designed for our largest, most security-conscious customers. See our [pricing page](https://www.langchain.com/pricing) for more detail, and [contact our sales team](https://www.langchain.com/contact-sales) if you want to get a license key to trial LangSmith in your environment.
This page describes how to set up **LangSmith** (observability, tracing, and evaluation) in a Kubernetes cluster. You'll use Helm to install LangSmith and its dependencies.
After completing this page, you'll have:
* **LangSmith UI and APIs**: for [observability](/langsmith/observability), tracing, and [evaluation](/langsmith/evaluation).
* **Backend services**: (queue, playground, ACE).
* **Datastores**: (PostgreSQL, Redis, ClickHouse, optional blob storage).
For [agent deployment](/langsmith/deployments): To add deployment capabilities, complete this guide first, then follow [Enable LangSmith Deployment](/langsmith/deploy-self-hosted-full-platform).
LangChain has successfully tested LangSmith on the following Kubernetes distributions:
* Google Kubernetes Engine (GKE)
* Amazon Elastic Kubernetes Service (EKS): For architecture patterns and best practices, refer to [self-hosting on AWS](/langsmith/aws-self-hosted).
* Azure Kubernetes Service (AKS): For architecture patterns and best practices, refer to [self-hosting on AWS](/langsmith/azure-self-hosted).
* OpenShift (4.14+)
* Minikube and Kind (for development purposes)
LangChain provides Terraform modules to help provision infrastructure for LangSmith. These modules can quickly set up Kubernetes clusters, storage, and networking for your deployment.
Available modules:
* [AWS Terraform modules](https://github.com/langchain-ai/terraform/tree/main/modules/aws)
* [Azure Terraform modules](https://github.com/langchain-ai/terraform/tree/main/modules/azure)
View the [full Terraform repository](https://github.com/langchain-ai/terraform) for documentation and additional resources.
## Prerequisites
Ensure you have the following tools/items ready. Some items are marked optional:
1. LangSmith License Key
1. You can get this from your LangChain representative. [Contact our sales team](https://www.langchain.com/contact-sales) for more information.
2. Api Key Salt
1. This is a secret key that you can generate. It should be a random string of characters.
2. You can generate this using the following command:
```bash theme={null}
openssl rand -base64 32
```
3. JWT Secret (Optional but used for basic auth)
1. This is a secret key that you can generate. It should be a random string of characters.
2. You can generate this using the following command:
```bash theme={null}
openssl rand -base64 32
```
### Databases
LangSmith uses a PostgreSQL database, a Redis cache, and a ClickHouse database to store traces. By default, these services are installed inside your Kubernetes cluster. However, we highly recommend using external databases instead. For PostgreSQL and Redis, the best option is your cloud provider’s managed services.
For more information, refer to the following setup guides for external services:
* [PostgreSQL](/langsmith/self-host-external-postgres)
* [Redis](/langsmith/self-host-external-redis)
* [ClickHouse](/langsmith/self-host-external-clickhouse)
### Kubernetes cluster requirements
1. You will need a working Kubernetes cluster that you can access via `kubectl`. Your cluster should have the following minimum requirements:
1. Recommended: At least 16 vCPUs, 64GB Memory available
* You may need to tune resource requests/limits for all of our different services based off of organization size/usage. Our recommendations can be found [here](/langsmith/self-host-scale).
* We recommend using a cluster autoscaler to handle scaling up/down of nodes based on resource usage.
* We recommend setting up the metrics server so that autoscaling can be turned on.
* If you are running Clickhouse in-cluster, you must have a node with at least 4 vCPUs and 16GB of memory **allocatable** as ClickHouse will request this amount of resources by default.
2. Valid Dynamic PV provisioner or PVs available on your cluster (required only if you are running databases in-cluster)
* To enable persistence, we will try to provision volumes for any database running in-cluster.
* If using PVs in your cluster, we highly recommend setting up backups in a production environment.
* **We strongly encourage using a storage class backed by SSDs for better performance. We recommend 7000 IOPS and 1000 MiB/s throughput.**
* On EKS, you may need to ensure you have the `ebs-csi-driver` installed and configured for dynamic provisioning. Refer to the [EBS CSI Driver documentation](https://docs.aws.amazon.com/eks/latest/userguide/ebs-csi.html) for more information.
You can verify this by running:
```bash theme={null}
kubectl get storageclass
```
The output should show at least one storage class with a provisioner that supports dynamic provisioning. For example:
```bash theme={null}
NAME PROVISIONER RECLAIMPOLICY VOLUMEBINDINGMODE ALLOWVOLUMEEXPANSION AGE
gp2 (default) ebs.csi.eks.amazonaws.com Delete WaitForFirstConsumer true 161d
```
We highly recommend using a storage class that supports volume expansion. This is because traces can potentially require a lot of disk space and your volumes may need to be resized over time.
Refer to the [Kubernetes documentation](https://kubernetes.io/do/langsmith/observability-concepts/storage/storage-classes/) for more information on storage classes.
2. Helm
1. To install `helm` refer to the [Helm documentation](https://helm.sh/docs/intro/install/)
3. Egress to `https://beacon.langchain.com` (if not running in offline mode)
1. LangSmith requires egress to `https://beacon.langchain.com` for license verification and usage reporting. This is required for LangSmith to function properly. You can find more information on egress requirements in the [Egress](/langsmith/self-host-egress) section.
## Configure your Helm Charts:
1. Create a new file called `langsmith_config.yaml` with the configuration options from the previous step.
1. There are several configuration options that you can set in the `langsmith_config.yaml` file. You can find more information on specific configuration options in the [Configuration](/langsmith/self-hosted) section.
2. If you are new to Kubernetes or Helm, we’d recommend starting with one of the example configurations in the examples directory of the Helm Chart repository here: [LangSmith helm chart examples](https://github.com/langchain-ai/helm/tree/main/charts/langsmith/examples).
3. You can see a full list of configuration options in the `values.yaml` file in the Helm Chart repository here: [LangSmith Helm Chart](https://github.com/langchain-ai/helm/tree/main/charts/langsmith/values.yaml)
Only override the settings you need in `langsmith_config.yaml`; don’t copy the entire `values.yaml`.
Keeping your config minimal ensures you continue to inherit new defaults and upgrades from the Helm chart.
2. At a minimum, you will need to set the following configuration options (using basic auth):
```yaml theme={null}
config:
langsmithLicenseKey: ""
apiKeySalt: ""
authType: mixed
basicAuth:
enabled: true
initialOrgAdminEmail: "admin@langchain.dev" # Change this to your admin email address
initialOrgAdminPassword: "secure-password" # Must be at least 12 characters long and have at least one lowercase, uppercase, and symbol
jwtSecret: # A random string of characters used to sign JWT tokens for basic auth.
```
You will also need to specify connection details for any external databases you are using.
## Deploying to Kubernetes:
1. Verify that you can connect to your Kubernetes cluster(note: We highly suggest installing into an empty namespace)
1. Run `kubectl get pods`
Output should look something like:
```bash theme={null}
kubectl get pods ⎈ langsmith-eks-2vauP7wf 21:07:46No resources found in default namespace.
```
If you are using a namespace other than the default namespace, you will need to specify the namespace in the `helm` and `kubectl` commands by using the `-n ` flag.
2. Ensure you have the LangChain Helm repo added. (skip this step if you are using local charts)
```bash theme={null}
helm repo add langchain https://langchain-ai.github.io/helm/"langchain" has been added to your repositories
```
3. Find the latest version of the chart. You can find the available versions in the [Helm Chart repository](https://github.com/langchain-ai/helm/releases).
* We generally recommend using the latest version.
* You can also run `helm search repo langchain/langsmith --versions` to see the available versions. The output will look something like this:
```
langchain/langsmith 0.10.14 0.10.32 Helm chart to deploy the langsmith application ...
langchain/langsmith 0.10.13 0.10.32 Helm chart to deploy the langsmith application ...
langchain/langsmith 0.10.12 0.10.32 Helm chart to deploy the langsmith application ...
langchain/langsmith 0.10.11 0.10.29 Helm chart to deploy the langsmith application ...
langchain/langsmith 0.10.10 0.10.29 Helm chart to deploy the langsmith application ...
```
4. Run `helm upgrade -i langsmith langchain/langsmith --values langsmith_config.yaml --version -n --wait --debug`
* Replace `` with the namespace you want to deploy LangSmith to.
* Replace `` with the version of LangSmith you want to install from the previous step. Most users should install the latest version available.
Once the `helm install` command runs and finishes successfully, you should see output similar to this:
```
NAME: langsmith
LAST DEPLOYED: Fri Sep 17 21:08:47 2021
NAMESPACE: langsmith
STATUS: deployed
REVISION: 1
TEST SUITE: None
```
This may take a few minutes to complete as it will create several Kubernetes resources and run several jobs to initialize the database and other services.
5. Run `kubectl get pods` Output should now look something like this (note the exact pod names may vary based on the version and configuration you used):
```
langsmith-backend-6ff46c99c4-wz22d 1/1 Running 0 3h2m
langsmith-frontend-6bbb94c5df-8xrlr 1/1 Running 0 3h2m
langsmith-hub-backend-5cc68c888c-vppjj 1/1 Running 0 3h2m
langsmith-playground-6d95fd8dc6-x2d9b 1/1 Running 0 3h2m
langsmith-postgres-0 1/1 Running 0 9h
langsmith-queue-5898b9d566-tv6q8 1/1 Running 0 3h2m
langsmith-redis-0 1/1 Running 0 9h
```
## Validate your deployment:
1. Run `kubectl get services`
Output should look something like:
```
NAME TYPE CLUSTER-IP EXTERNAL-IP PORT(S) AGE
langsmith-backend ClusterIP 172.20.140.77 1984/TCP 35h
langsmith-frontend LoadBalancer 172.20.253.251 80:31591/TCP 35h
langsmith-hub-backend ClusterIP 172.20.112.234 1985/TCP 35h
langsmith-playground ClusterIP 172.20.153.194 3001/TCP 9h
langsmith-postgres ClusterIP 172.20.244.82 5432/TCP 35h
langsmith-redis ClusterIP 172.20.81.217 6379/TCP 35h
```
2. Curl the external ip of the `langsmith-frontend` service:
```bash theme={null}
curl /api/tenants
```
Expected output:
```json theme={null}
[{"id":"00000000-0000-0000-0000-000000000000","has_waitlist_access":true,"created_at":"2023-09-13T18:25:10.488407","display_name":"Personal","config":{"is_personal":true,"max_identities":1},"tenant_handle":"default"}]
```
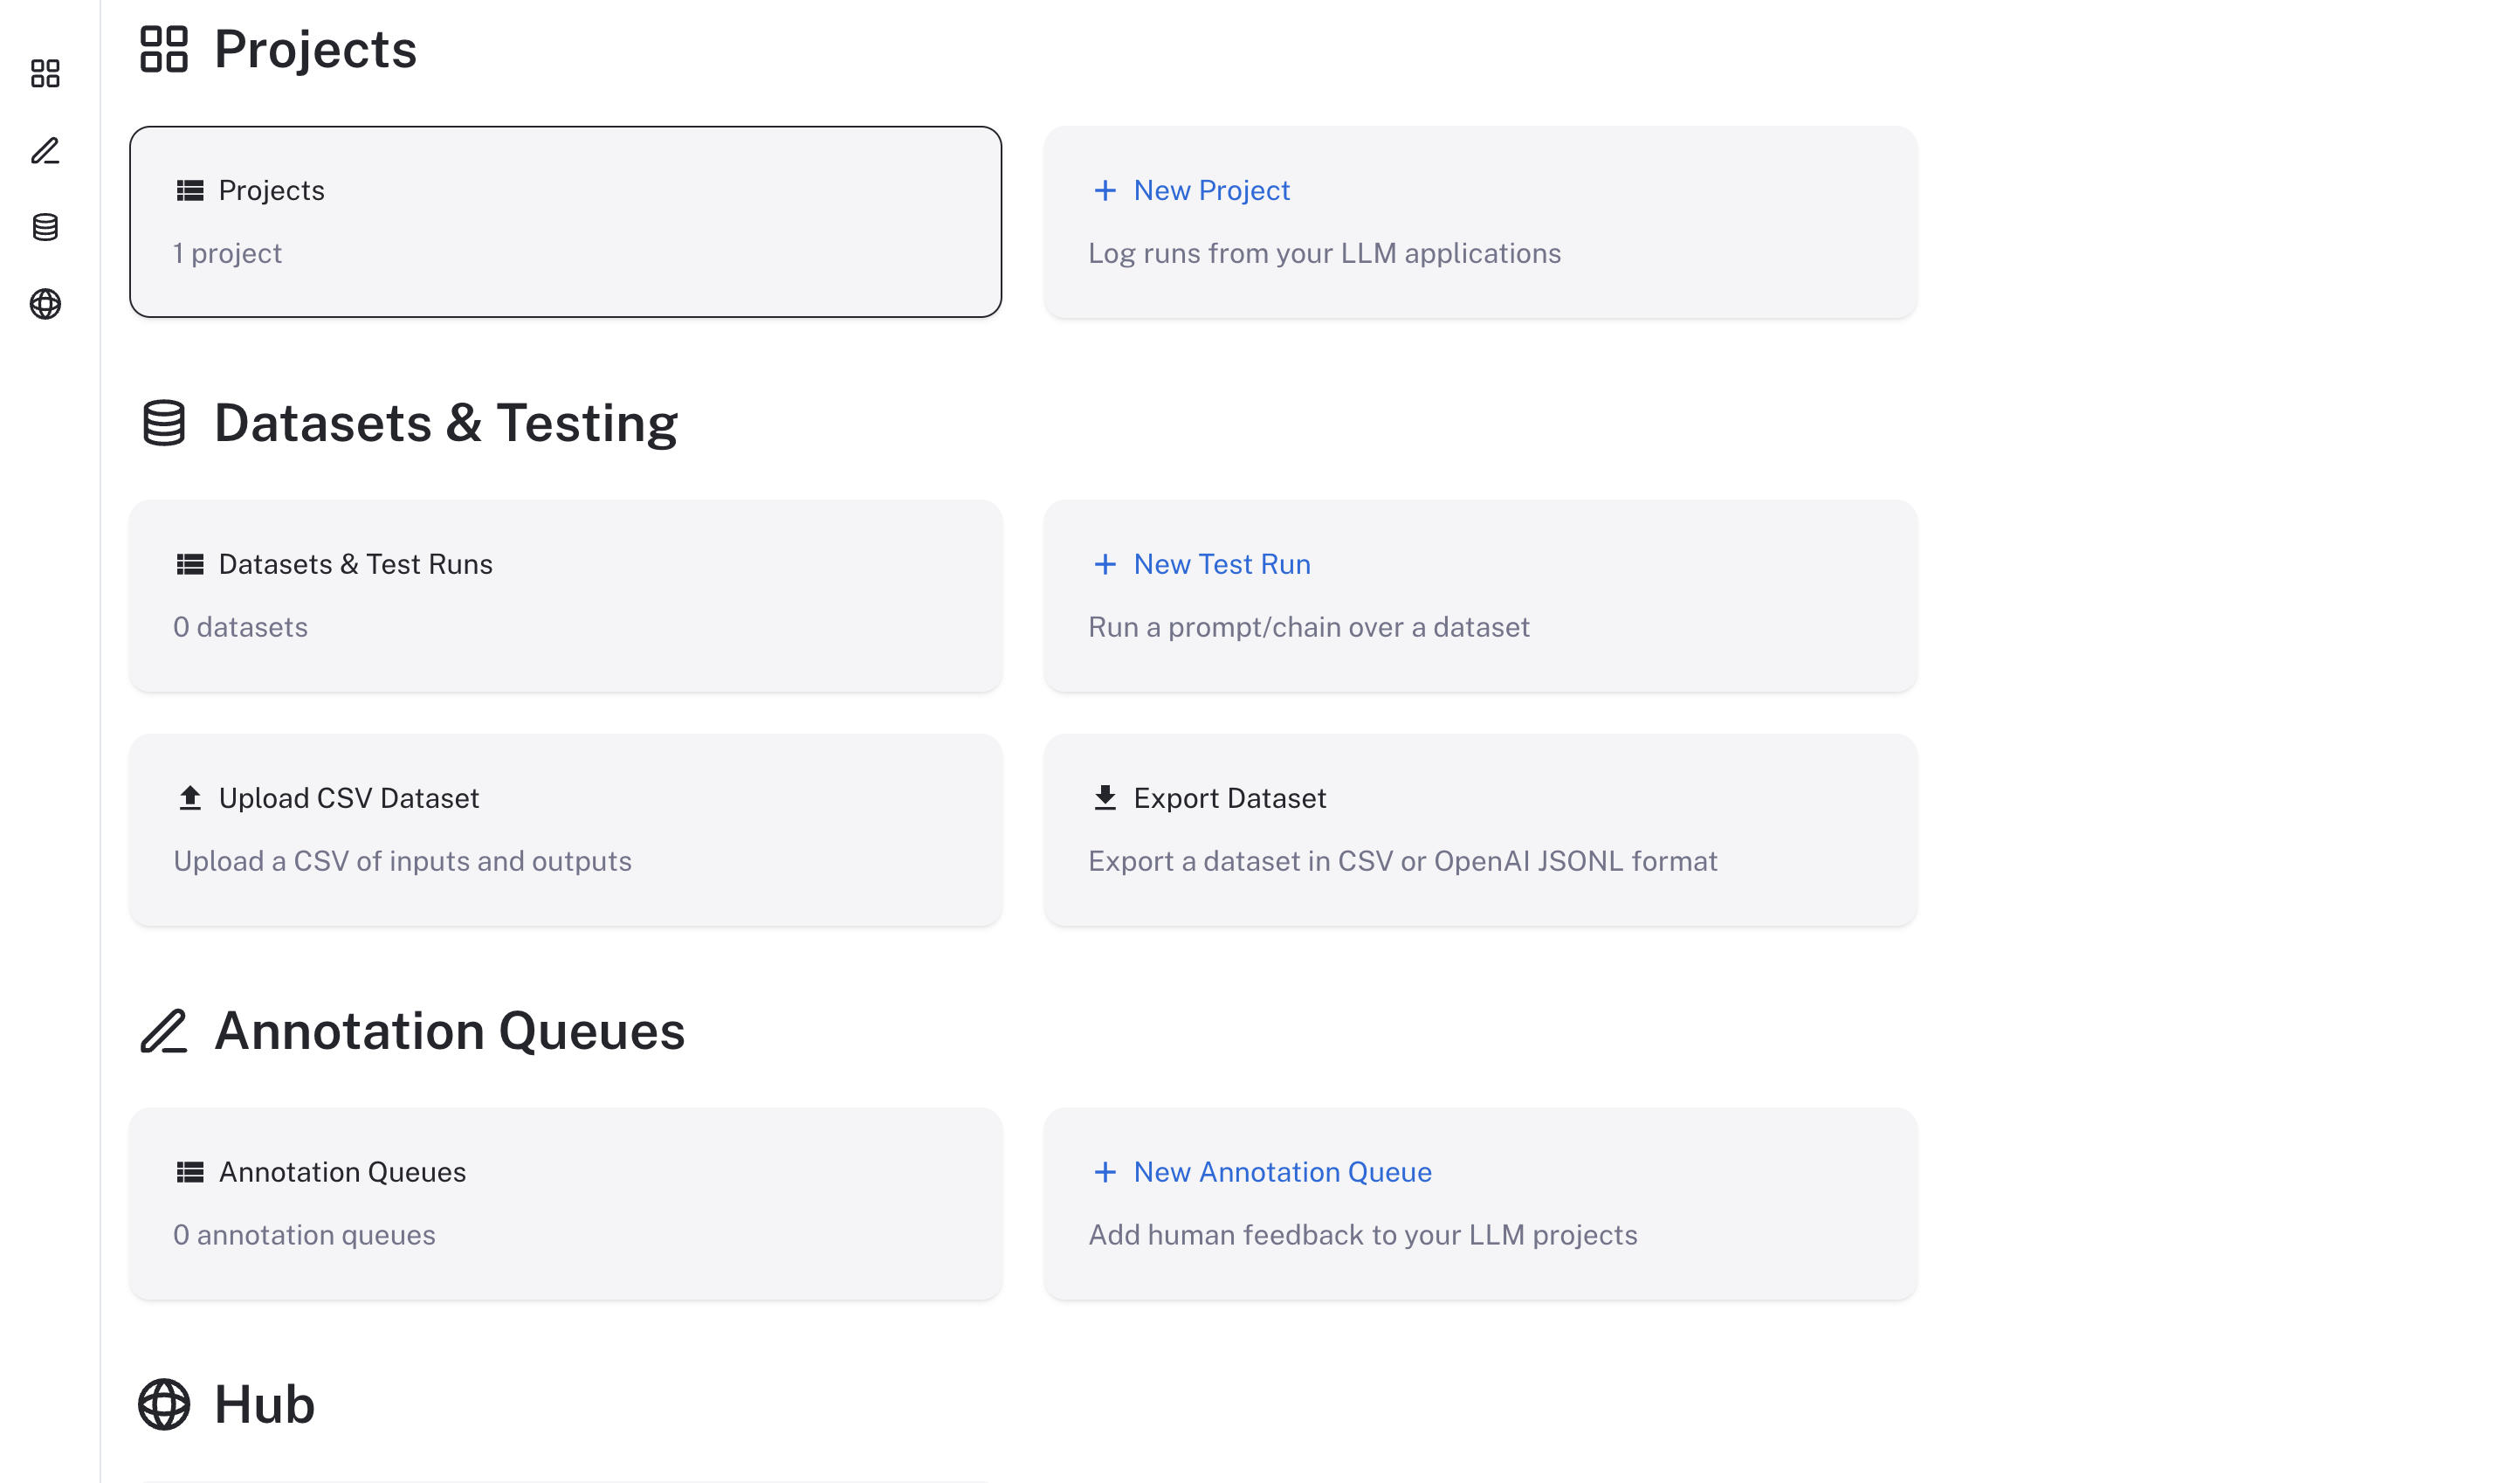
3. Visit the external ip for the `langsmith-frontend` service on your browser
The LangSmith UI should be visible/operational
 ## Using LangSmith
Now that LangSmith is running, you can start using it to trace your code. You can find more information on how to use self-hosted LangSmith in the [self-hosted usage guide](/langsmith/self-hosted).
Your LangSmith instance is now running but may not be fully setup yet.
If you used one of the basic configs, you will have a default admin user account created for you. You can log in with the email address and password you specified in the `langsmith_config.yaml` file.
As a next step, it is strongly recommended you work with your infrastructure administrators to:
* Setup DNS for your LangSmith instance to enable easier access
* Configure SSL to ensure in-transit encryption of traces submitted to LangSmith
* Configure LangSmith with [Single Sign-On](/langsmith/self-host-sso) to secure your LangSmith instance
* Connect LangSmith to external Postgres and Redis instances
* Set up [Blob Storage](/langsmith/self-host-blob-storage) for storing large files
Review our [configuration section](/langsmith/self-hosted) for more information on how to configure these options.
***
[Edit the source of this page on GitHub.](https://github.com/langchain-ai/docs/edit/main/src/langsmith/kubernetes.mdx)
[Connect these docs programmatically](/use-these-docs) to Claude, VSCode, and more via MCP for real-time answers.
## Using LangSmith
Now that LangSmith is running, you can start using it to trace your code. You can find more information on how to use self-hosted LangSmith in the [self-hosted usage guide](/langsmith/self-hosted).
Your LangSmith instance is now running but may not be fully setup yet.
If you used one of the basic configs, you will have a default admin user account created for you. You can log in with the email address and password you specified in the `langsmith_config.yaml` file.
As a next step, it is strongly recommended you work with your infrastructure administrators to:
* Setup DNS for your LangSmith instance to enable easier access
* Configure SSL to ensure in-transit encryption of traces submitted to LangSmith
* Configure LangSmith with [Single Sign-On](/langsmith/self-host-sso) to secure your LangSmith instance
* Connect LangSmith to external Postgres and Redis instances
* Set up [Blob Storage](/langsmith/self-host-blob-storage) for storing large files
Review our [configuration section](/langsmith/self-hosted) for more information on how to configure these options.
***
[Edit the source of this page on GitHub.](https://github.com/langchain-ai/docs/edit/main/src/langsmith/kubernetes.mdx)
[Connect these docs programmatically](/use-these-docs) to Claude, VSCode, and more via MCP for real-time answers.